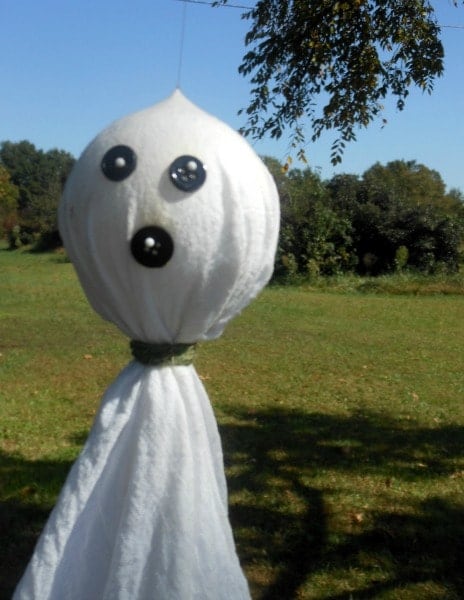
How cute is this little guy, eh?
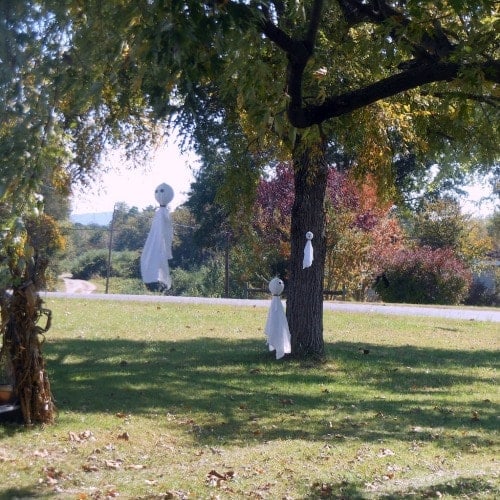
This is one of my many little Halloween ghosties flying in the breeze beneath the trees in our yard.
I mentioned before that I LOVE all things Halloween– my decorations are included.
I made about a dozen of these little ghosts last year and they withstood all the wind and rain of that season and have returned for a second, which is really great because they were super cheap to make and I basically love them.
There are a few bats, too, courtesy of the Dollar Tree.
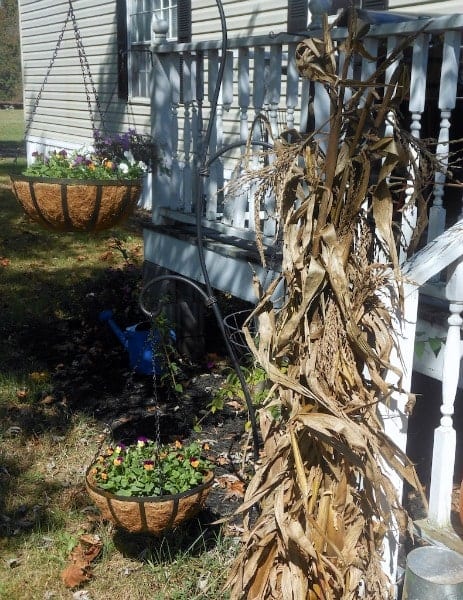
There are dried corn stalks tied to the porch posts, courtesy of Chad traipsing around in our neighbor’s cornfield…
Did I tell you that they were selling these things for $10/bundle at Lowe’s? That seemed awfully high considering that most farmers just mow over this stuff after they harvest. Also this is something of a farming community. There is a cornfield on every corner. What were you thinking, Lowe’s? I’m just saying.
There are fall flowers aplenty (I can’t remember the last time I had an excuse to use the word “aplenty” I feel like I’m talking like a pilgrim.).
We’ve got little ghosts that line either side of our gravel driveway- another prize I found at the Dollar Tree. I don’t know about you, but I am all about decorating for $1. Especially when my decorations last for more than one holiday season. This is the second year the driveway ghosts have made an appearance, too!
But even with all of these cutesy happy Halloweeny things going on in my yard, the hanging fabric ghosts are still my favorites.
So let me tell you really quickly how to make them.
Crafty Outdoor Halloween Decorations
You will need:
- cheesecloth (this can be found in most grocery stores; I found it here and my stores never carry ANYTHING!)
- styrofoam craft balls (found at any craft store- the size is up to you and your fabric!)
- scissors
- twine (kitchen or garden twine)
- black buttons in various sizes
- push pins
- fishing line for hanging
- a sewing needle for attaching the fishing line to the top of the ghost’s head
I laid my cheesecloth out across the table and put my styrofoam craft ball in the center. I pulled the fabric around the ball, closing my fist underneath (where the twine will be). I adjusted the fabric so it fit to my liking, adjusting for the amount of fabric of the “body” that hangs below the head. I wrapped the twine around the base of the fabric-wrapped-styrofoam-ball and tied it off securely, snipping away any loose ends. Then I used my scissors to make the edges of the fabric that made up the ghosts “body” a little bit jagged.
Because I don’t think ghosts make a habit of hemming their sheets.
I use two or three black buttons for each ghost- not all of mine have mouths – and I held the buttons in place with the push pins. I was sort of random with the placement of the pins; some of the button eyes have two pins in each, some four. Same for the mouths. I wanted each ghost to be just a little bit different.
Thread the needle with the fishing line and push it through ONLY THE FABRIC at the top of your ghosts heat. If you try to sew through the styrofoam you run the risk of breaking bits off of it. If you need a visual aid, check the photo at the top of this post. Tie the fishing line to the fabric securely and make sure to leave yourself enough length in the line that you can hang it from the branches or shepherd’s hooks around your yard.
Hang up your ghosts! Enjoy them all the way through Halloween!!
UPDATE: This post was shared with the Cowgirl Up! Link Party #37, hosted by The Farmhouse Porch Check it out!!! There are seriously HUNDREDS of entries. It’s an awesome was to find new projects, new reads, and share some of your own creations!
How do you decorate for Halloween?


Peggy Campbell
Friday 4th of October 2013
Awesome mommy...you are that.
Heather
Friday 4th of October 2013
No you are!
Ginny McMeans
Friday 4th of October 2013
These are so cute! I am a little scared though. :0 That is suppose to be a scared face. Love your newsletter.
Heather
Friday 4th of October 2013
Thanks so much Ginny! I hang these little ghosts every year and also make more. They multiply! Ghost colony in my yard.
Reese's Pieces Peanut Butter Cookies | Sugar Dish Me
Thursday 3rd of October 2013
[…] can see my easy (and cheap to make!!) Halloween decorations here– plus instructions for how to make […]
thepinkrachael
Saturday 20th of October 2012
Love the ghosts - so cute!! It's not really worth decorating my apartment, I won't get any trick or treaters here and there's no-one to really enjoy it! But, we'll decorate the classroom and do some fun Halloweeny crafts in school, have a pumpkin and get dressed up and have a halloween party - that's always great fun! Last year, we made pumpkin soup, but since I have the same class I need to think of something else to do this year...!!
Sugar Dish
Saturday 20th of October 2012
Thanks! I never know if we will get trick-or-treaters out here, but I decorate outside because it makes me happy whenever I walk out of the house. Yea Halloween!!! So great that you celebrate in the classroom. I never know if my kids are gonna be able to; it's hit or miss. What did you decide on for a costume?
Choc Chip Uru
Wednesday 17th of October 2012
Awwww your decorations are so adorable (in sunlight ;)
Cheers Choc Chip Uru
Sugar Dish
Wednesday 17th of October 2012
haha I like the sunlight disclaimer. Thanks!