Sticky, delicious, and made from scratch breakfast treats! Apple Walnut Danish are easy to make and look so pretty! This recipe also makes quite a few, so it’s great for a crowd or you can freeze the dough!
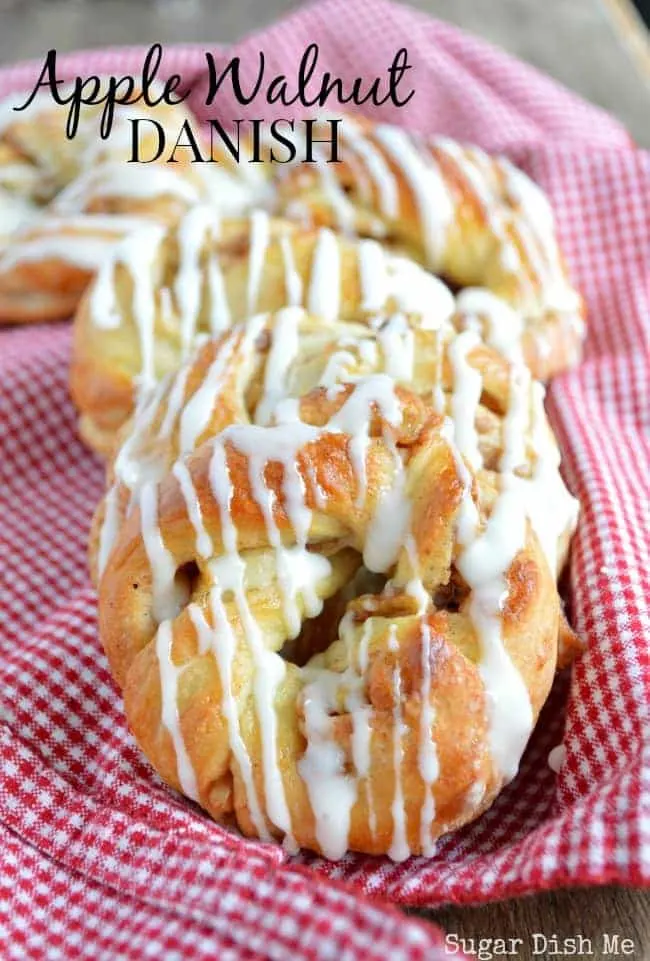
In my opinion, you can never ever go wrong with pastries and coffee.
Ever.
Some of you verrrry long time readers might remember that this time last year I was working on a project with a local coffee shop that I was pretty excited about.
They hired me to develop recipes to sell in their new location and it sounded like so much funnn!
Except it wasn’t.
Because actually they hired me to bake up box mixes from Aldi and then resell them for like a 700% mark up, …annnnnd… I am not all about that. It feels like icky lying cheating. Also their kitchen was like the grossest kitchen in the coffee-shop-baking world. Ew.
AND!!! The oven was on a shorted circuit so everything would come out looking undercooked on one side and overcooked on the other. So I sort of panicked because I could not put my name on that mess. I tried to nicely explain what was up, but as it would happen most people do not like to be presented with truth. The relationship fizzled and I was both annoyed with their total unprofessionalism and majorly relieved.
Because here’s the thing: making your own pastries from scratch is no big deal. It seems complicated but it’s really not. And if I’m paying $2.75 for a freaking muffin it better not be from a box mix that cost 99 cents. **End Rant**

I don’t normally include step-by-step photos in my recipes because for me it can get a little bit tedious, but for these Apple Walnut Danish (Danishes? What is the plural of danish? Hm.) I decided to offer a few visuals up because I wanted you to know just how easy it is, and also I think it will help you better understand how to shape the danish so it looks all pretty and people think you are a major superstar.
Because You Are.
So here’s what you need to know about this recipe: Don’t be freaked out by the length of time it will take.
There’s really not much active time involved, just plenty of rising and waiting. It’s perfect for one of those mornings that you have 42 loads of laundry you need to tackle, or other house things that will keep you home-bound for a little bit.
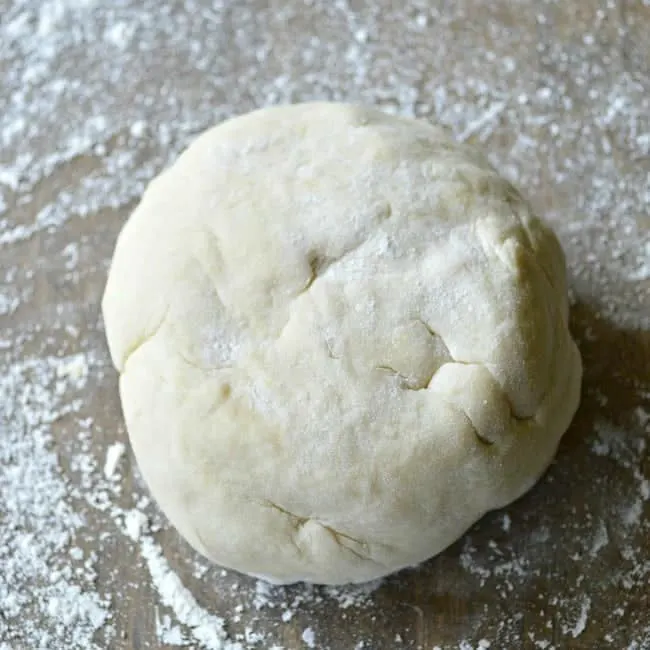
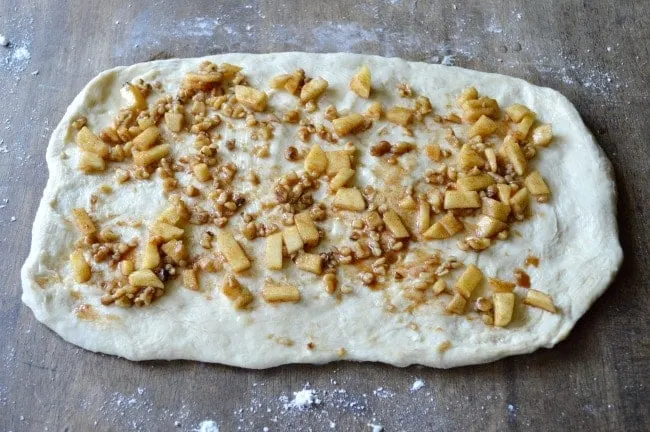
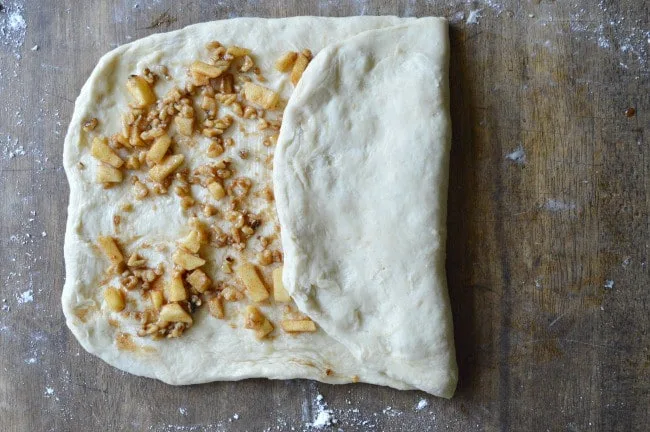
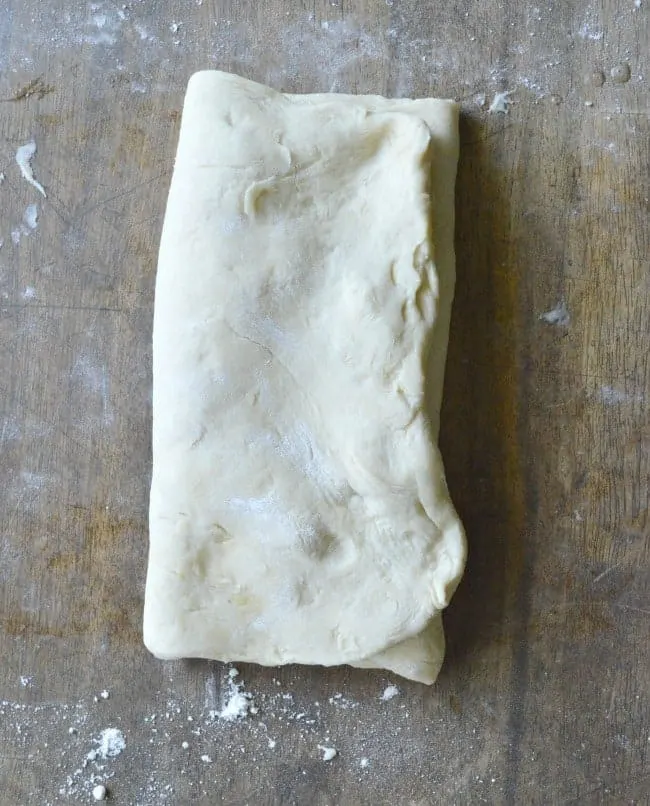
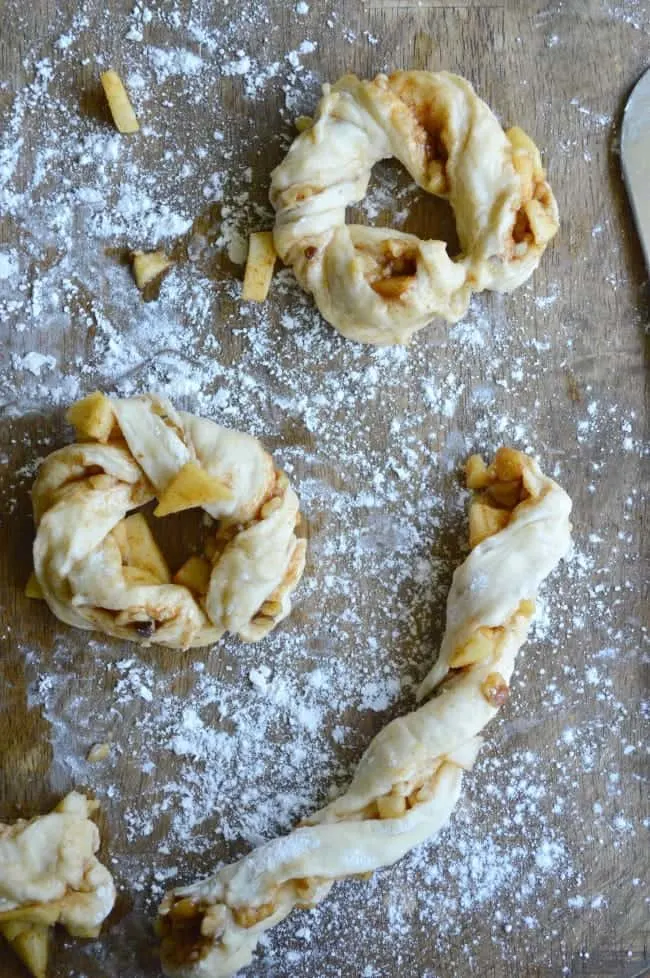
After the dough rises, you stretch it and fill it just like you would with a sweet roll. Then you fold it up like a delicious pastry envelope and cut it into slices. Twist the slices and pinch the ends together to make a circle and bam! Apple Walnut Danish.


Apple Walnut Danish
Making homemade danish is easy!!! Don't be intimidated by the times listed for making this Apple Walnut Danish - the active time is minimal and the results are delicious! Apple Walnut Danish is perfect for a big breakfast, brunch, or potluck! Remember you will need to allow at least 2 hours for the dough to chill.
Ingredients
For the Dough:
- 2 1/4 teaspoons active dry yeast (1/4 ounce package)
- 1/4 cup warm water (read the yeast package for exact temp recommendations)
- 5 cups all purpose flour + additional for the work surface
- 1/4 cup granulated sugar
- 1 teaspoon salt
- 1 teaspoon lemon zest
- 1 cup (2 sticks) cold butter
- 1 cup warm milk (same temp as the water)
- 2 eggs, lightly beaten
For the Filling:
- 1 1/2 cups chopped tart apples (Honey Crisp, Granny Smith, or Gala apple varieties are my favorites)
- 3/4 cup chopped walnuts
- 1/4 cup sugar
- 1 teaspoon cinnamon
- 2 tablespoons melted butter
- 1 egg + 1 tablespoon water for egg wash
For the Glaze:
- 1/2 cup powdered sugar
- 3 tablespoons milk
- 1/2 teaspoon vanilla
Instructions
- In a liquid measuring cup, dissolve the yeast in the warm water.
- In a large bowl, whisk together the flour, sugar, salt, and lemon zest. Cut the butter into the flour mixture. My favorite method is by using a box grater (just like in scones or biscuits) . Then incorporate the butter into the flour with your fingers until coarse crumbles form. Stir in the yeast/water mixture, the warmed milk, and the eggs.
- Turn the dough out onto a well-floured surface and knead for about 2 minutes. I had to flour my hands as well. The dough will be tacky. Place it in a bowl, cover, and refrigerate for at least 2 hours or overnight.
- When you are ready to bake, preheat the oven to 400 and butter a baking sheet, or line with parchment paper.
- Make your filling by stirring together the chopped apples, walnuts, sugar, cinnamon, and melted butter.
- Punch down the dough and divide it in half. Cover the half you aren't working with. On a floured surface, stretch the dough into an 18 X 15 rectangle. You could roll it out, but I just press with my hands. Cover the dough with the filling spread to within about 1/2" of the edges.
- To fold the dough, start with a short side. Fold it towards the middle. Then fold the other short side over it (see photos). Repeat this process with the dough you set aside, and then cut each into 15 slices. (If you folded it as shown in the photos you'll cut horizontally)
- Twist each slice a few times and then pinch the ends together to make a circle. This is what gives your danish a braided appearance. Place them about 2 inches apart on the prepared baking sheets.
- Mix together the egg + 1 tablespoon water and brush the top of each danish with it.
- Bake for 12 - 15 minutes. The tops will be a pretty golden brown.
- Mix together the confectioner's sugar, milk, and vanilla extract to make the glaze. Drizzle it over the top of each danish.
- Store in an airtight container for 4-6 days
Recommended Products
As an Amazon Associate and member of other affiliate programs, I earn from qualifying purchases.
Nutrition Information:
Yield:
30Serving Size:
1Amount Per Serving: Calories: 145Total Fat: 4gSaturated Fat: 1gTrans Fat: 0gUnsaturated Fat: 3gCholesterol: 29mgSodium: 95mgCarbohydrates: 23gFiber: 1gSugar: 6gProtein: 4g
Oh! And I thought you’d like an awkward life update: Every time I go to the hair salon, the couple that owns that coffee shop manages to come in, and the dude, that clearly has no concept of unspoken social boundaries, stands and makes annoying small talk with my stylist while I try to cover my face with my hair like Cousin It so he can’t see me rolling my eyes and trying very hard not to say what I think.
What I think: Clean your kitchen and make your own pastries.



Glynis Joy Arnold
Sunday 11th of July 2021
Making these for a 2nd time. So easy, delicious and impressive. I always share my baking and these got fabulous reviews. This time I have made the dough the night before to save time in the morning. Looking forward to serving these with friends over coffee for brunch.
Heather Tullos
Monday 12th of July 2021
Thank you so so much! I am so glad you've enjoyed these and thanks for the time-saving tips!
Victoria
Saturday 19th of January 2019
I like the way you write. A lot. All the best
Heather Tullos
Monday 21st of January 2019
Ha - thank you, Victoria!
Andrew Hopkins
Wednesday 13th of January 2016
Thank for sharing. It look so yummy. I will try to make it
Heather Tullos
Wednesday 13th of January 2016
Thanks, Andrew!
Serena
Wednesday 11th of November 2015
Since the admin of thjis web page iss working, no hesitation very rapidly it will be well-known, due to its featture contents.
Rabia
Saturday 23rd of May 2015
How does your glaze keep that bright white color after drizzling it onto the danishes? My glaze is clear!
Heather Tullos
Sunday 24th of May 2015
Hi Rabia! 1/2 cup powdered sugar + 3 Tbsp milk should give you a pretty white glaze. If it's clear them maybe start with a smaller amount of liquid and add it a tiny bit at a time until you have a color/consistency that looks like what you want. Glaze is really forgiving. You can just keep adding more powdered sugar or more milk to make it thinner or thicker according to your preference. So glad you liked these! This is definitely one of my favorite pastries to make.
Rabia
Saturday 23rd of May 2015
Sorry! I meant to out 5 stars on it! Didn't realize it put 1! Definitely 5 Stars!